When I chat with people about how to take better photos with their smartphones, I can feel the frustration and the overwhelm. I mean, we all want gorgeous photos, right? However, we have little ones to chase after. And we don’t want to overcomplicate documenting our memories beautifully. We just need it to be easy. Well, you are in for a treat today because the #1 tip for taking better photos with your iPhone is exactly that. Easy.
After seeing my photos, I usually always get the same question… “how do you make them look like classic pictures? Like portraits?”. And what this translates to is “how do I take photos that don’t look like run-of-the-mill snapshots if I just have a smartphone?“. The trick and #1 tip for taking better photos with your iPhone or any smartphone for that matter is all in the angle in which you hold it.
Let me break this down for you visually so you can see what I am talking about.
We were out on a family walk the other day. I simply told these two cubs to look at me and smile for a quick snapshot. Because I am obviously taller than them, my angle in that moment and without putting in any effort or much thought, was from above. This was how I was holding my iPhone at the moment:
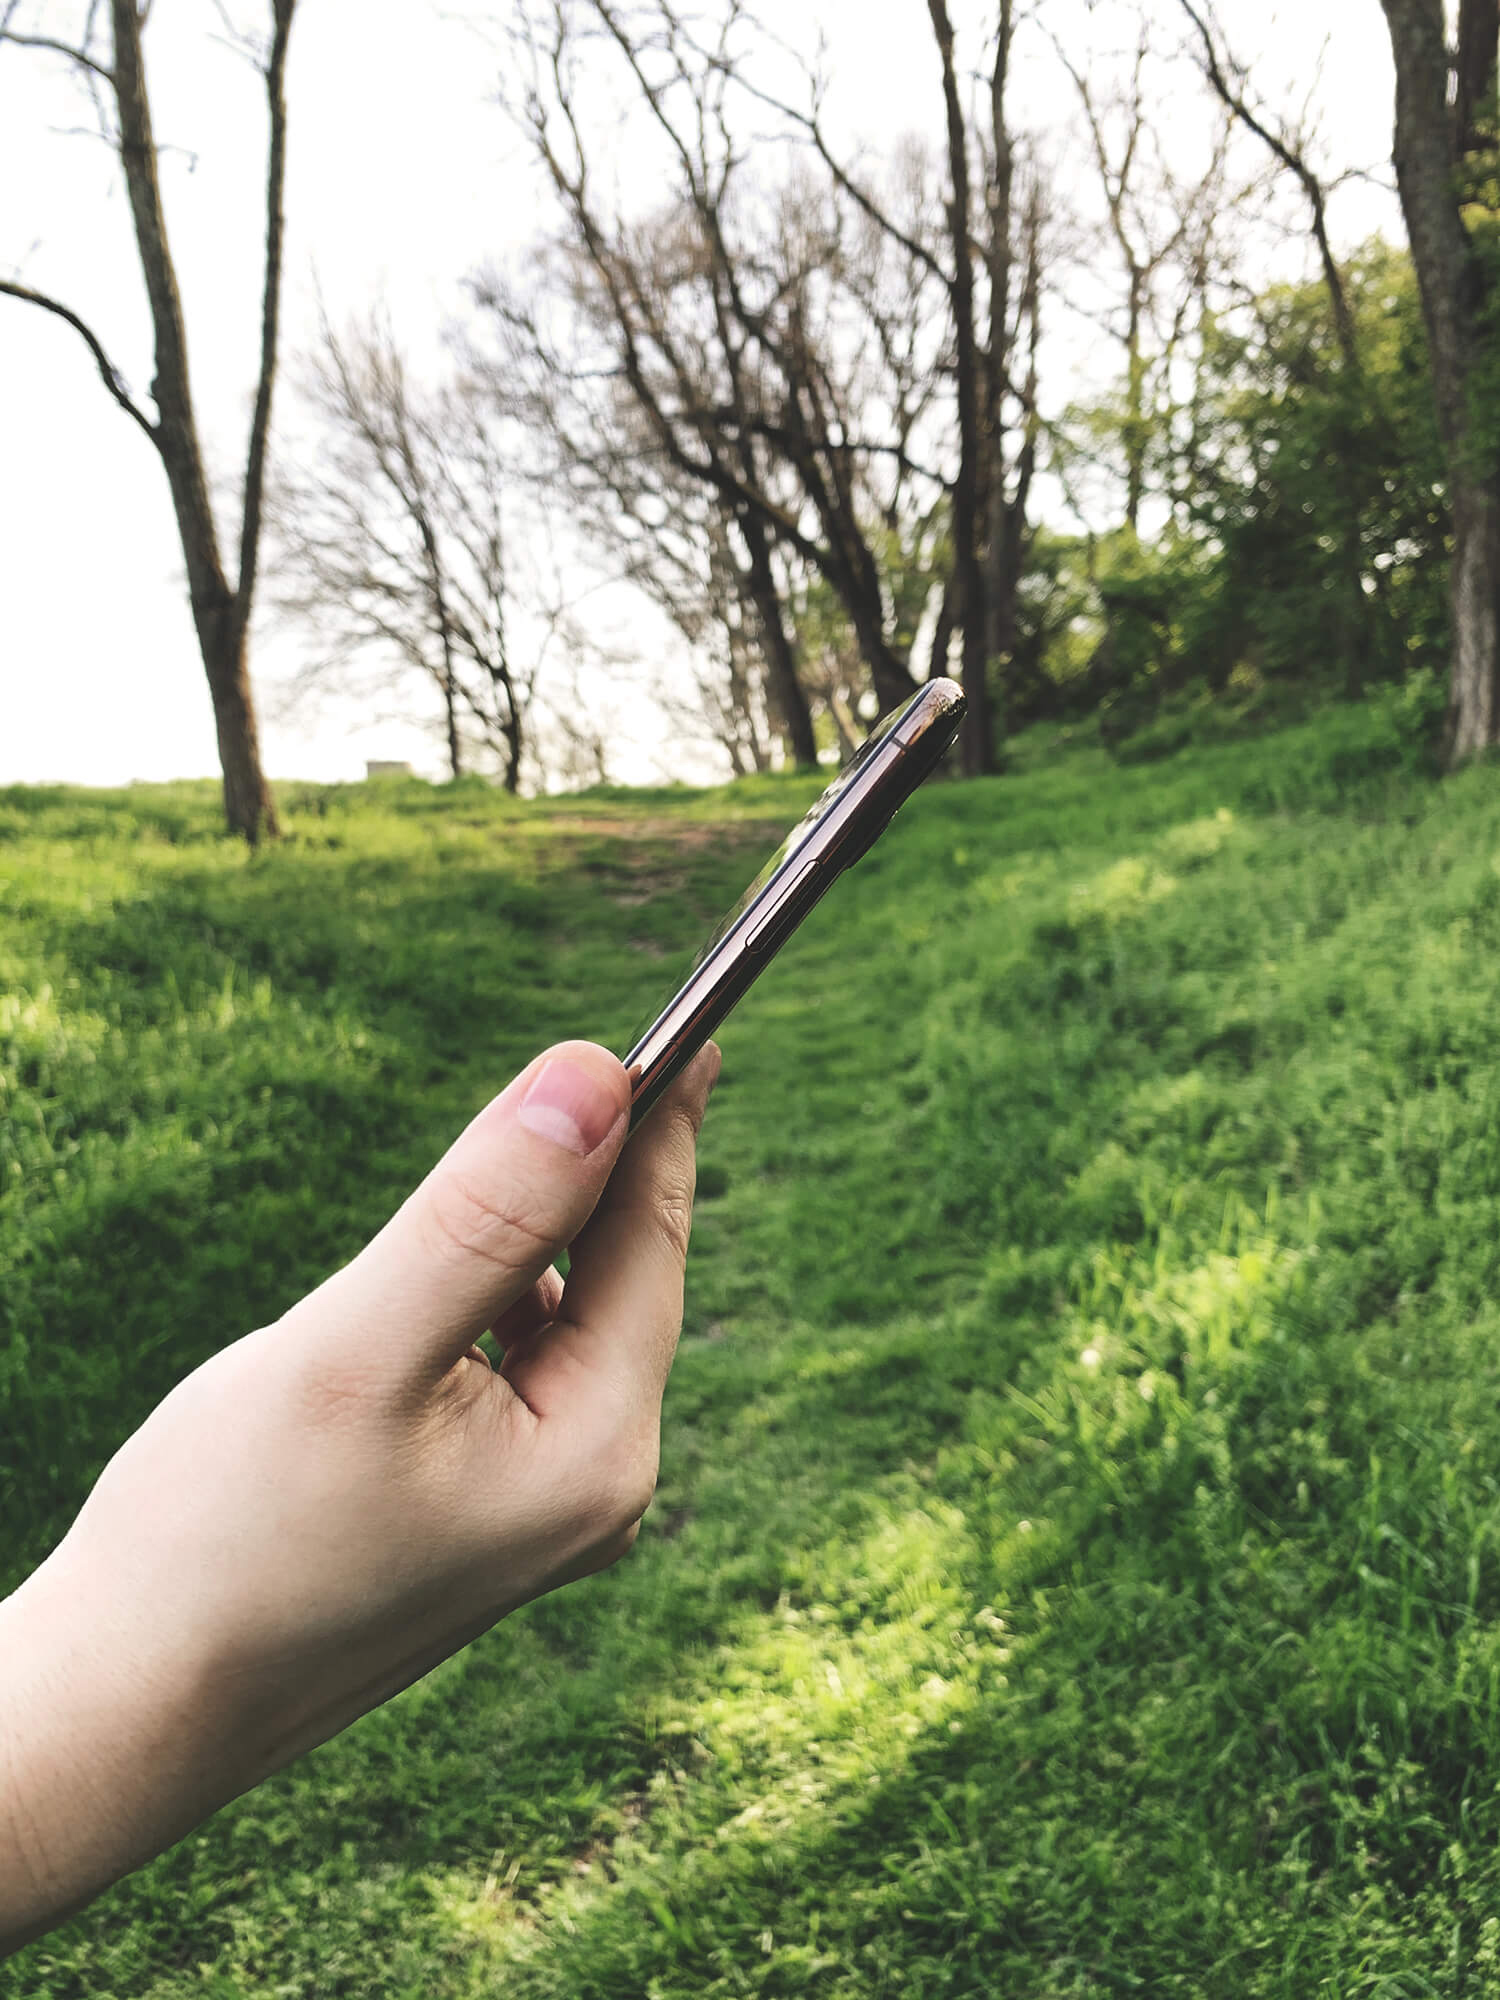
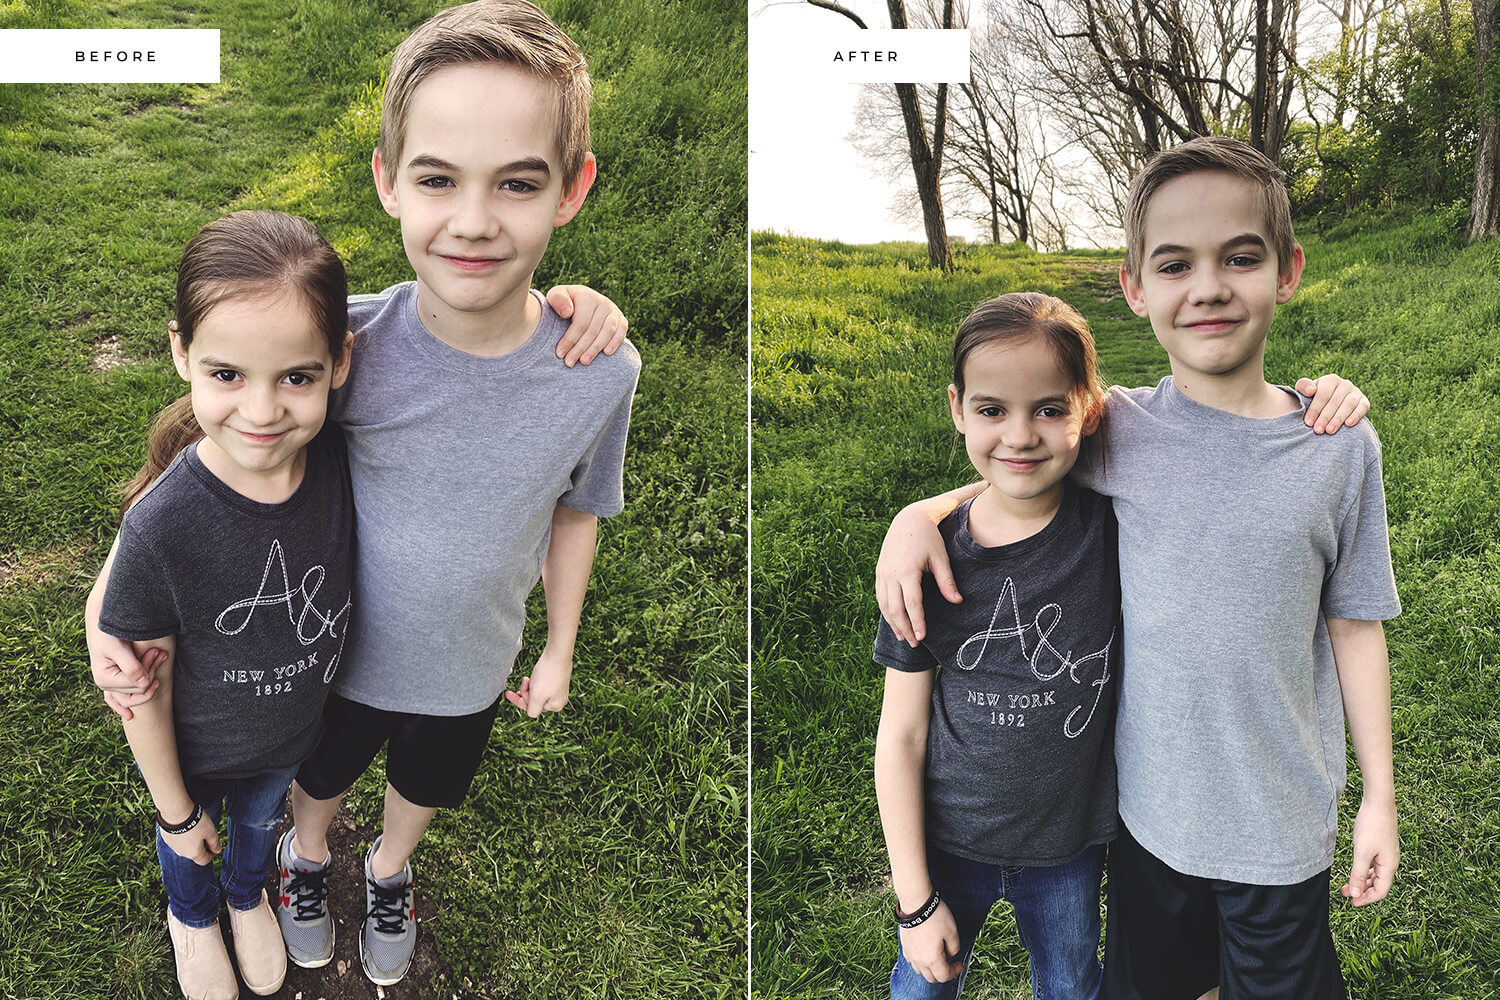
Because the lenses used in smartphones are of a wider variety, they do create some distortion. When you compound that with holding your iPhone or any smartphone at an angle, that distortion is going to be even more. With holding my iPhone as I was above, this is the photo I was able to snap:

Please know that any photo we document of our children is worthy, but for the sake of this post and why you are reading it right now, we aren’t going for any photo. We want beautiful photos. So let’s continue on.
When I stop to adjust the way I am holding my iPhone by just a bit – to be parallel with my subjects – things can then completely change for the better. For this second attempt, I adjust the angle of my iPhone so now I am holding it like this:
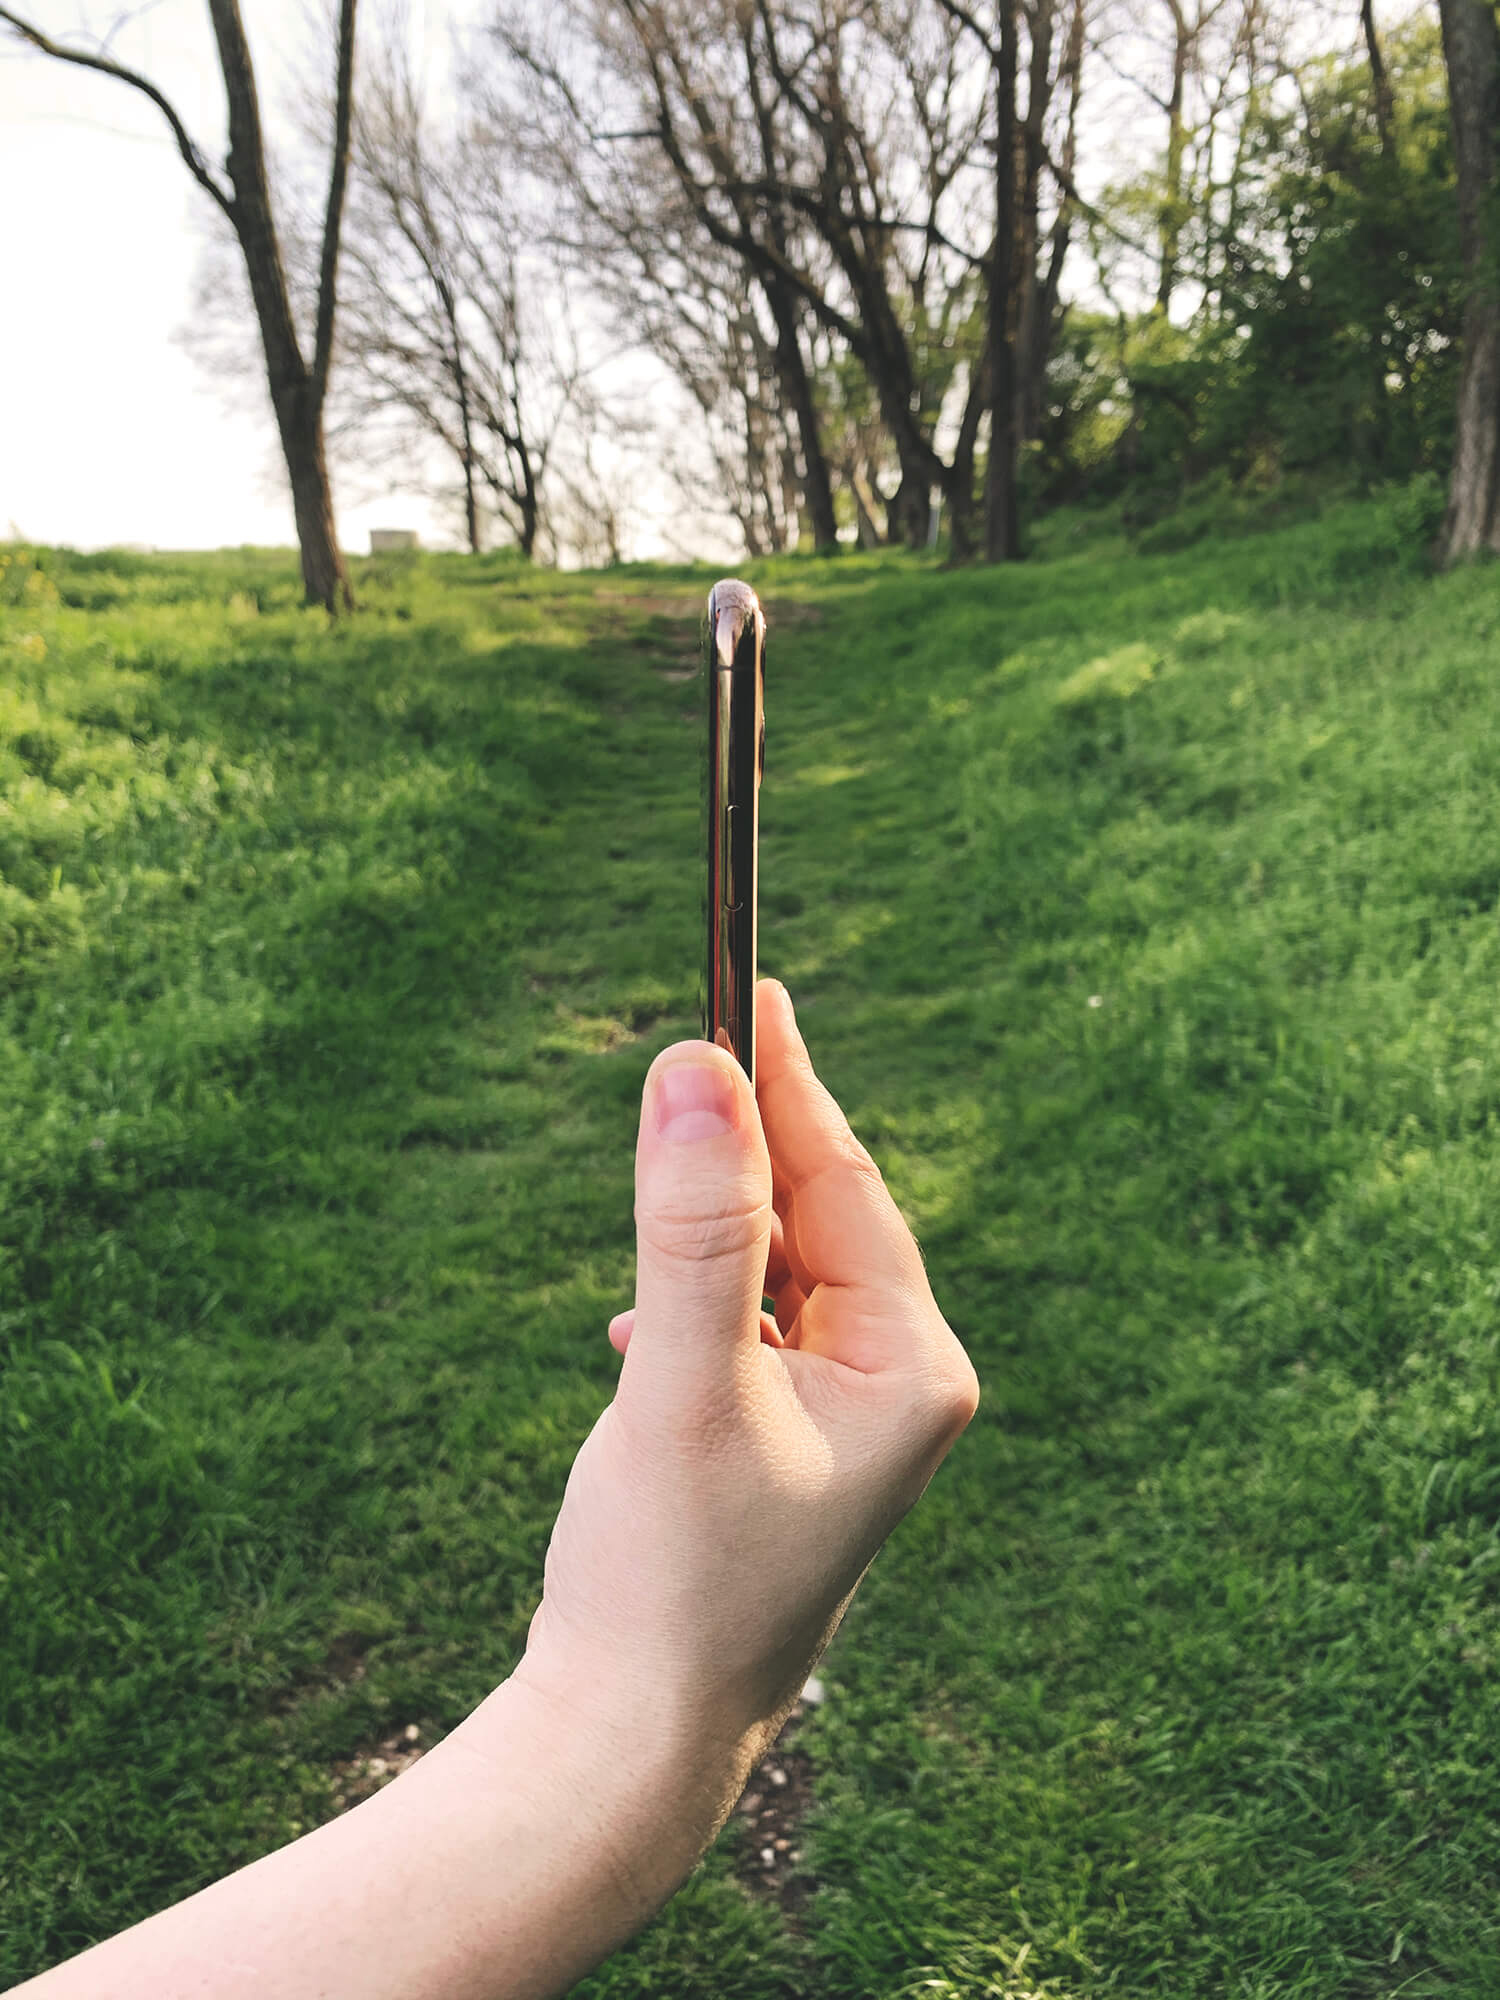
Holding my iPhone like this and facing my subject is going to help reduce distortion and also help me achieve a more classic feel to my photo. So here is what we end up with after making that small adjustment in the angle:

Are we seeing the wonderful difference?! We went from standard, everyday snapshot to something with a classic, more portrait feel and all I had to do was adjust how I was holding my iPhone. Here is a side-by-side comparison:
I’m telling you. When you can get into the habit of taking that extra second or two to adjust your position, you will really start to see your everyday photos transform. It’s so easy to simply pull that iPhone out of your pocket and just snap. However, a tiny sprinkling of intentionality will give you albums and albums full of gorgeous moments.
So now let’s see what this same photo opp would like using portrait mode. If you are new here, you have to know one thing about me. I do not believe you have to have the latest and greatest to have worthy photos. This is why I always try and show comparisons and examples using the standard settings on an iPhone. I know not everyone may have a newer model with portrait mode.
However, because of what I share and teach I want to always make sure and be sharing what technology can do for our everyday documenting.
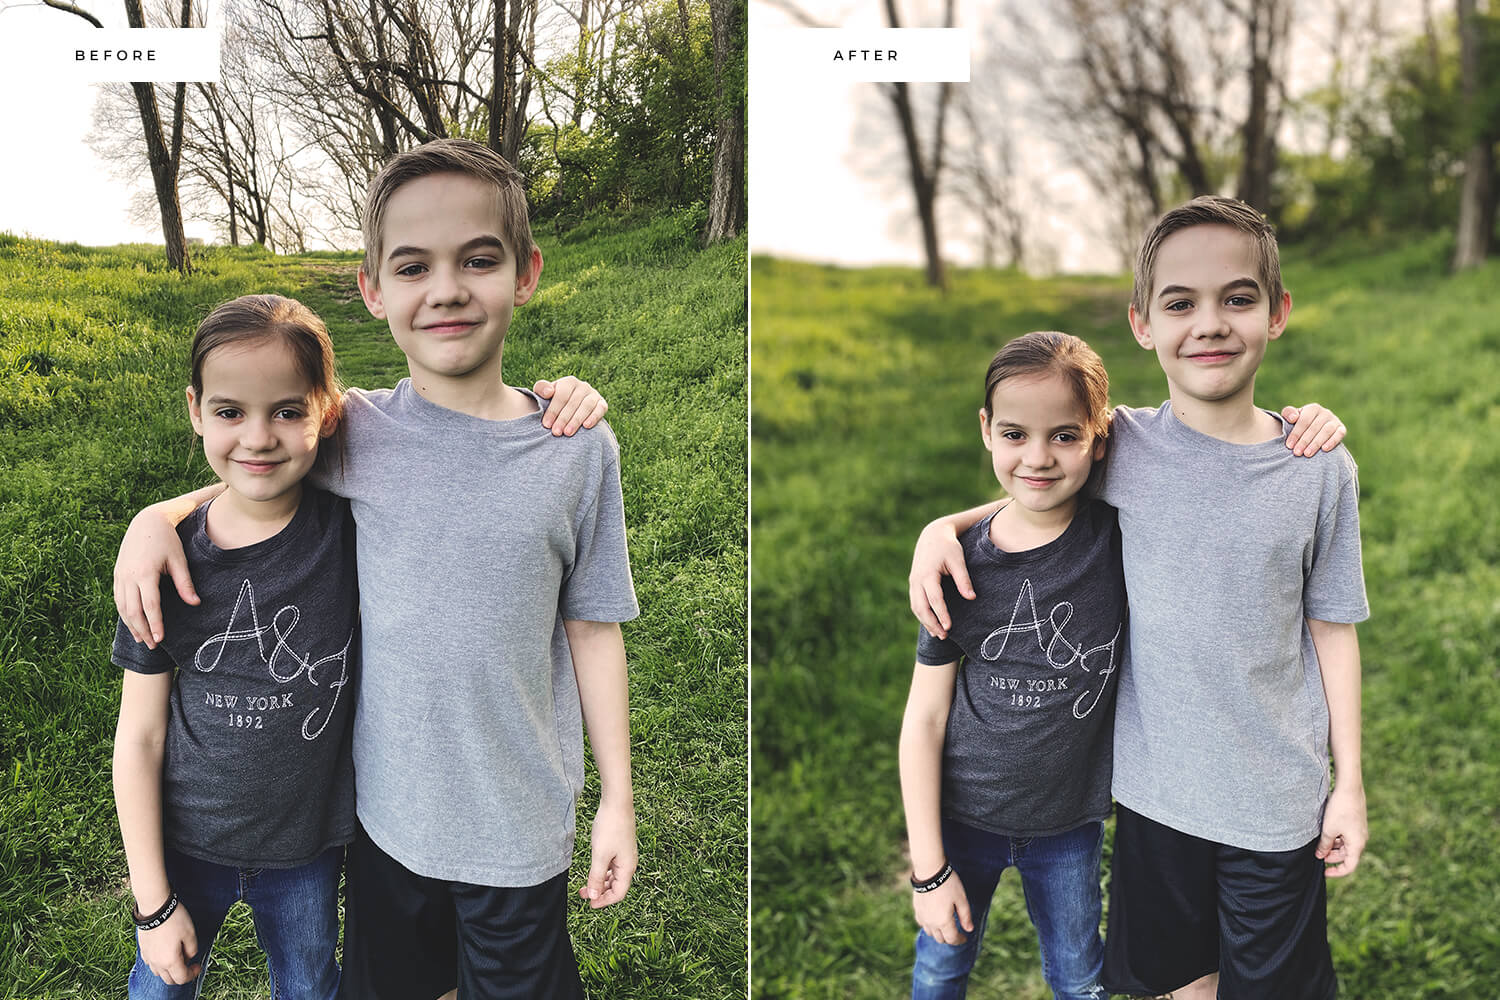
With that being said, here is the same image using the 2x portrait mode setting on my iPhone 11 Pro Max:

I mean, how great is that? You will notice a little bit of extra blurring on the very edges of their arms. But for a camera on a smartphone? How wonderful that we have such convenient technology to make documenting that much easier.
And of course, we have got to see what this snapshot would look like in a black and white edit. Because they are kind of my favorite…

Oh, my documenting addictive photography loving heart be still! And a big thank you to these two cuties! They were so great to help me demonstrate the #1 tip for taking better photos with your iPhone. Seriously, this is my ride-or-die, must-do thing to really fall in love with the photos you take daily. Whether it’s your cubs, a landscape shot – doesn’t matter. To achieve that more classic feel, focus on how you are holding your iPhone!
If you are new here, you may not have grabbed my free black & white preset yet. It’s the same one I used above and I would love for you to have it and enjoy for yourself! You simply use it with the free Lightroom mobile app. And don’t worry, I also give you install instructions with the instant download. Anyway, download it now and let me know how you like it!
And if you found this photo tip helpful, pop over here for even more memory-keeping inspiration. Be sure and stay tuned as well! We are in the process of making huge upgrades to my courses and I cannot WAIT to share more with you in the coming months!




April 6, 2021