Encrypting Sensitive Information Within Evernote

Hi friends!
So I promised you that I would continually share tips on Evernote and the hacks I discover so you can fall in love with it as well. If you are new here, you can catch this previous post I did which is an overview of how I am using Evernote in 2016. I began using Evernote last year and at the start of 2016 really dove into harnessing the potential and power it has for organizing so many aspects of my work and personal life. Along the way, I continually discover new tools, ways of doing things and hacks that are making it even more amazing.

Today I wanted to share with you all about encrypting sensitive information within Evernote. I am always weary of sensitive information being in digital form due to safety and privacy which I am sure a lot of you worry about the same thing. However, it feels like I have a MILLION passwords to remember between email accounts, bank accounts, shopping logins, social media account logins… and the list goes on and on and on. You feel me? I don’t know about you, but I don’t think i can possibly cram another piece of information or set of letters and numbers in my brain. So I’m waving my white flag and giving it up to Evernote.
How do we do this? Within my ‘Passwords’ notebook in Evernote, I have set up a ‘Passwords’ note. I simply have added in every account, the username and login using a created spreadsheet. The step to encrypting all of this valuable information is easy.
Step 1: Highlight all of the text within your Password note
Step 2: Right click and select ‘Encrypt selected text’
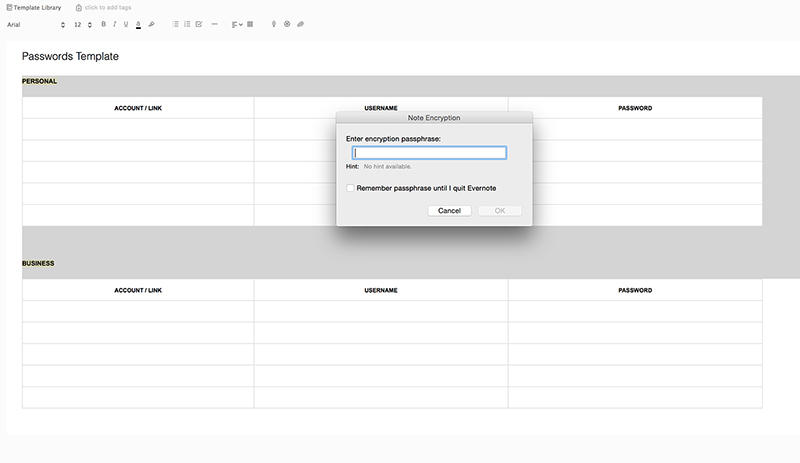
Step 3: From the pop-up box you will enter a master password or phrase. This will be what you enter each time you want to access your master list of passwords. Yes, it will require you to remember just one more password 😉 You can also choose whether you want Evernote to remember the password until you shut down or if you want to enter it each time. For added security, I left that box unchecked.
Step 4: Once you select ‘OK’ you will see your entire note of information disappear and you are left with a small drop down bar. Now each time you access this specific note, you will click the drop down arrow and enter your master password to be able to access all of your information.

Pretty convenient, right? I also wanted to make sure and share the simple I created template for those of you who would also like to store your information this way. You can access the template right here and save it to your own Evernote account. To add rows to either table follow these steps:
1. Click on the last row of the table you wish to add rows to
2. Right click and select ‘Tables’ from the pop up menu and then select ‘Add Row Below’
Happy Friday, friends!


May 13, 2016